⚠️ Note: You can only share projects with other XYCLE users. External email addresses that are not linked to a XYCLE account will not be able to access shared projects.
1. Open the Project Menu
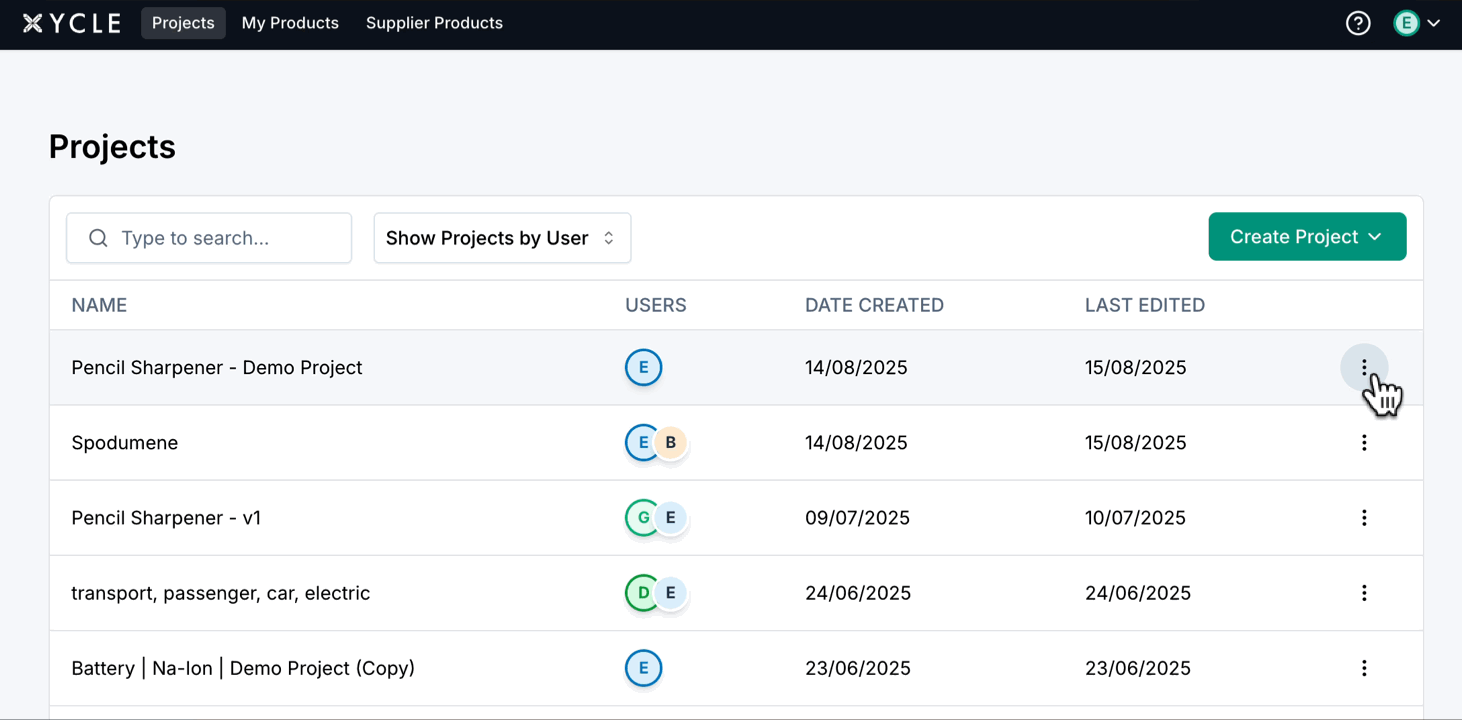
On the XYCLE homepage, locate the project you want to share. Click the three-dot menu on the right-hand side of the project row and select "Share" from the dropdown.
2. Add the Recipient’s Email
In the pop-up modal, type the email address of the person you want to share the project with and hit Enter. You can add multiple users this way.
- Green email highlights: The person is already part of your organisation in XYCLE.
- Orange email highlights: The person is a registered XYCLE user but not in your organisation.
3. Confirm Sharing
After adding all users, click the "Confirm" button. The project is now shared and the users will have view-only access by default.
4. Review Shared Access
Back on the project list, you’ll see icons next to the project name showing who has access. Hovering over these icons will reveal the list of shared users.
5. Manage Permissions
You can re-open the "Share" menu at any time to:
- Add more users
- Promote a user to Project Owner (giving them editing rights)
- Revoke access
🔐 Only project owners can make changes to a model. Viewers will see the model in read-only mode.
6. Want to Edit a Shared Project but You’re Not the Owner?
If you’re a viewer and need to make changes, click the three-dot menu and choose "Duplicate". This will create a private, editable copy of the project under your name.